

Fall is in full swing and the chilly winter season is not far behind it. Seems like my summer trip to Hawaii was so long ago! To give me one last reminder of my vacation and the sunny summer weather, I thought I’d splash on some bright colors on my nails.
Read on to find step-by-step detailed instruction on how to do this hawaiian-inspired mani!
What you’ll need:
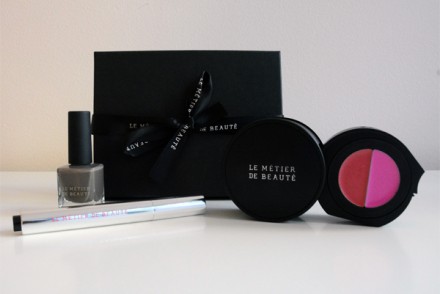
- American Apparel Neon Polish, in Green
- American Apparel Neon Polish, in Coral
- A toothpick
- Sephora Collection Nail Lacquer, in Myrtille
- Art Club Nail Art Lacquer, in Marine Dream
- OPI Start To Finish (Base & Top Coat)
How to do it:
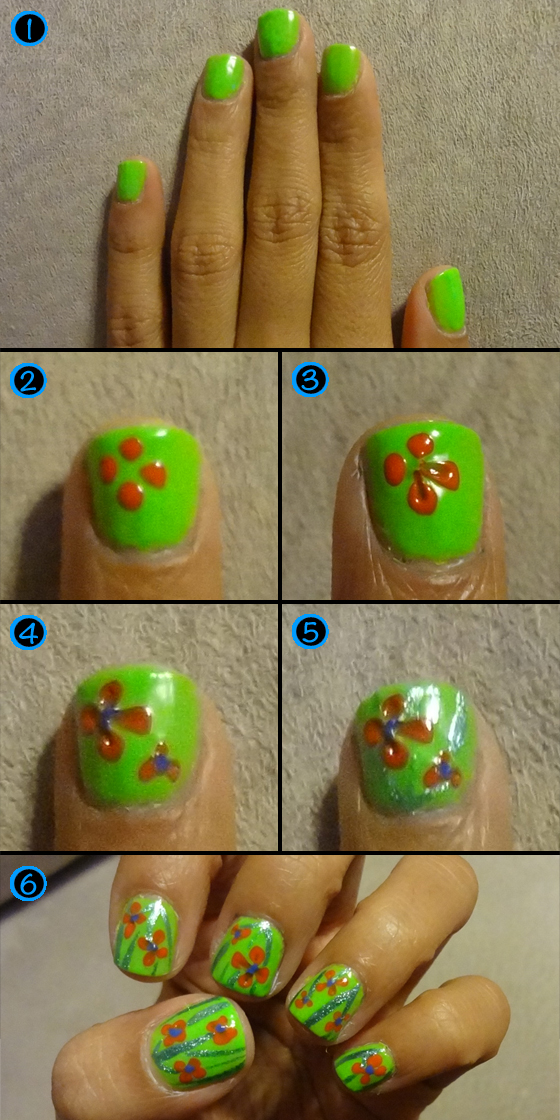
- Start off with painting your nails with a clear base, then paint them neon green.
- Draw four dots using the neon coral polish.
- To make it a flower, use the toothpick to smudge each of the dots (start at the middle of the dot and work towards the center of where the four dots meet).
- Once that has dried slightly, dot the center of the flower with the myrtille-colored polish.
- To give it more of a 3D effect, draw “leaf” lines using the nail art lacquer.
- Once the polish has dried completely (this is very important or you’ll smudge the flowers), finish off your masterpiece with a top-coat for a super shiny look!
OMG even all your nail polish is from AA
ha you know AA is my fave!
These are too cute. I’m not sure I have the talent for it though. Maybe on my toes, but my hands tend to look like a toddler painted them.
lol love jess’ comment. these nails are cray in a good way. :) love ur nail tutorials, gita! xo