
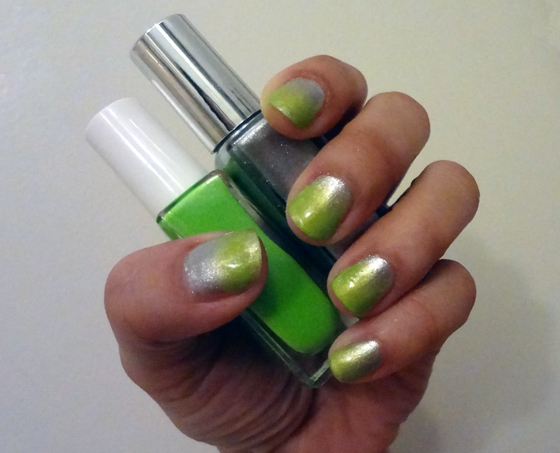
I was looking for a spring nail design to do and knew I wanted something ‘green’, but I wasn’t quite ready for the flower fields that spring is usually connected to. While browsing the net, I had seen an ombre nail design in which the effect was accomplished using a sponge. I had decided to try this out using neon green and silver polish for an edgy spring nail design.
It looks complicated, but it’s surprisingly not hard to do. Read on to find out how!
What you’ll need:
- American Apparel Metallic Nail Polish, in Silver Jazz
- American Apparel Nail Polish, in Neon Green
- OPI Start To Finish (Base & Top Coat)
- Sponge (you can use make-up triangle sponge or cut up a piece of dish washing sponge)
- Paper plate
- Toothpick
- Nail brush
- Nail polish remover
How to do it:
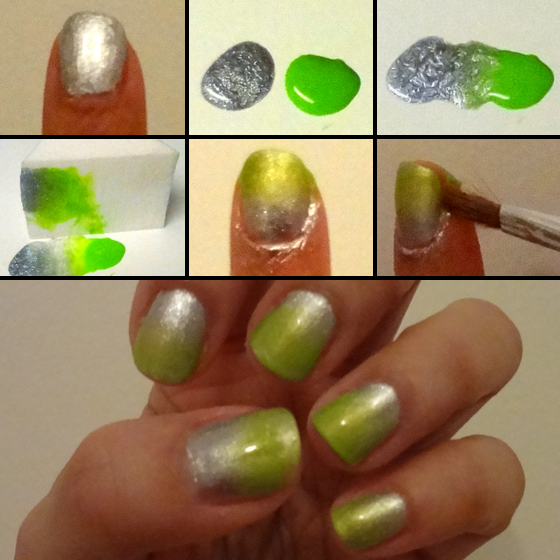
- Start off with painting your nails with a clear base, then paint them with two coats of the silver polish. Wait for polish to dry before completing next step.
- On the back of the paper plate, put two drops of the silver and neon green nail polish.
- Mix the edges of the paint using a toothpick.
- “Squish” the make up sponge on the color mix.
- Use sponge to stamp the ombre nail design on your nail in a left-to-right motion. Don’t worry about getting paint on the side of your nails—we’ll fix that later. You may have to repeat this step to get the desired color depth you want.
- once you’ve painted all 10 fingers, you can clean the edges using nail brush and polish remover.
- Finish off your masterpiece with a top-coat for a super shiny look!


Love it thanks for sharing!
Ha! I love it. That shade of green is really great!
xo
girlintheyellowdress.com