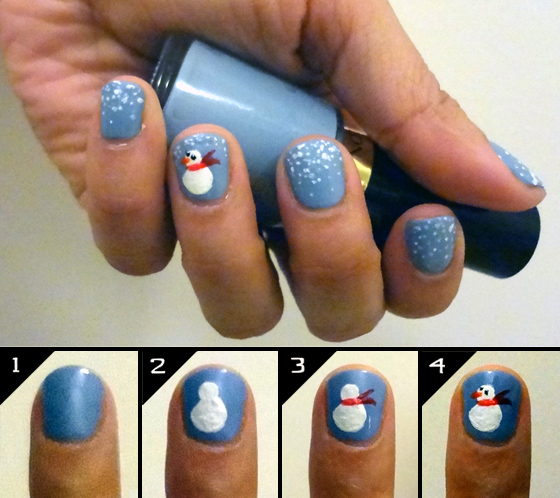
This DIY-Frosty The Snowman nail design is the perfect thing to get you into the holiday spirit. And you know what’s synonymous with DIY? Money savings! Which means more cash for holiday shopping. You nails have never looked so good clicking on that buy button!
To create the design, you’ll need a nail brush and nail polish color in blue, white, red, orange, black, as well as clear base and top coat.
How to do it:
- Start off with painting your nails with a clear base, then paint them with two coats of blue polish.
- With the white polish, draw two circles for the snowman’s body and head.
- Using the red polish, draw a short line through the two circles, then a ‘v’ coming out of it to make the scarf.
Finish off your masterpiece by adding dots to create illusion of snowflakes and topping it off with a clear top coat.